End to end solution to track tank level using cloud computing without having to worry too much with managing infrastructure.
This is a 3 part tutorial on how to create a farm tank monitoring solution on Google Cloud.
- Part 1 — Build a Rest API using Cloud Run and Django Rest Framework
- Part 2 — MicroPython device to collect tanks data
- Part 3 — Visualizing data using BigQuery Federated Queries and Data Studio
For this tutorial we’re going to be using Django Rest Framework as our base for the project. Django is really easy to get started, plays well with SQL Databases to save our models data and also provide a nice admin interface to manage those models without having to spend too much time building that. Django Rest Framework is a layer on top of Django to make it easy to build a REST API from our models.
In this particular scenario we are going to be saving our farms info, tanks inside each farm and devices associated to a tank. That data is going to be stored on Google Cloud SQL, while the device telemetry is going to be save BigQuery, to handle a much bigger amount of data being sent from time to time by the IoT devices.
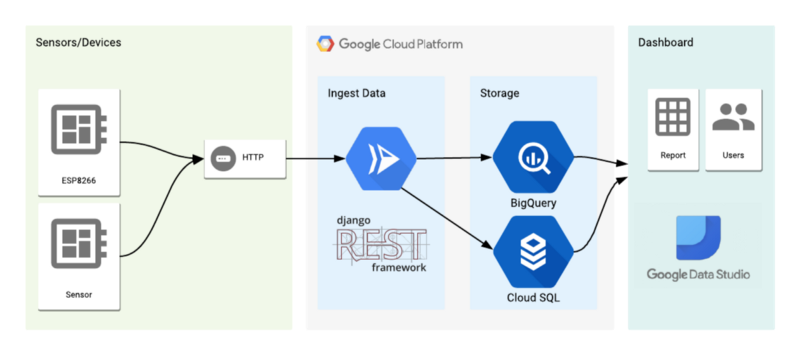
Project Architecture
To monitor our data, we are going to build a dashboard on Data Studio, mixing data from Cloud SQL and BigQuery using the Federated Queries feature.
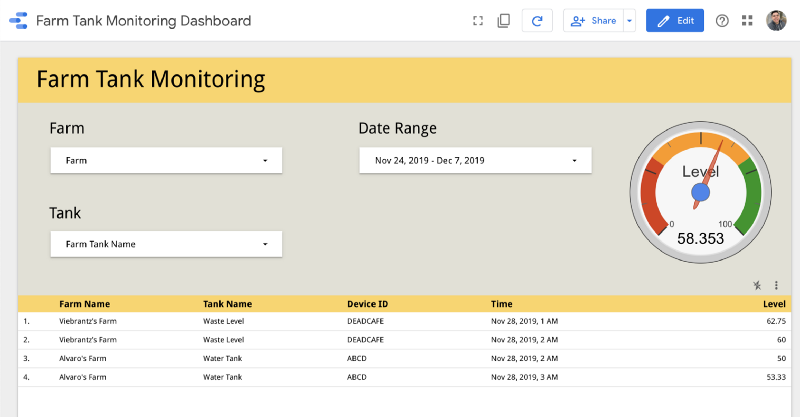
Data Studio Dashboard
Create and Setup Django Rest Framework project
For this article here I’m going to use Python 3.7 and Django 2.2. To bootstrap the project, I just followed the docs on Django Rest Framework to install the dependencies and create base project. You can skip this and clone the project, but this is just for reference on how the project was build. In summary I used the following commands:
mkdir myproject
cd myproject

# Create a virtual environment to isolate our package dependencies locally
python3 -m venv env source env/bin/activate

# Install Django and Django REST framework into the virtual environment
pip install django djangorestframework

# Install database specific libraries for the project, in this case PostgresSQL and Bigquery
pip install google-cloud-bigquery psycopg2

# Additional libraries to run the project and serve static files
pip install gunicorn whitenoise

# Set up a new project with a single application
django-admin startproject myproject .
django-admin startapp tank_monitoring

# Freeze dependencies to be used on the Docker container
pip freeze > requirements.txt
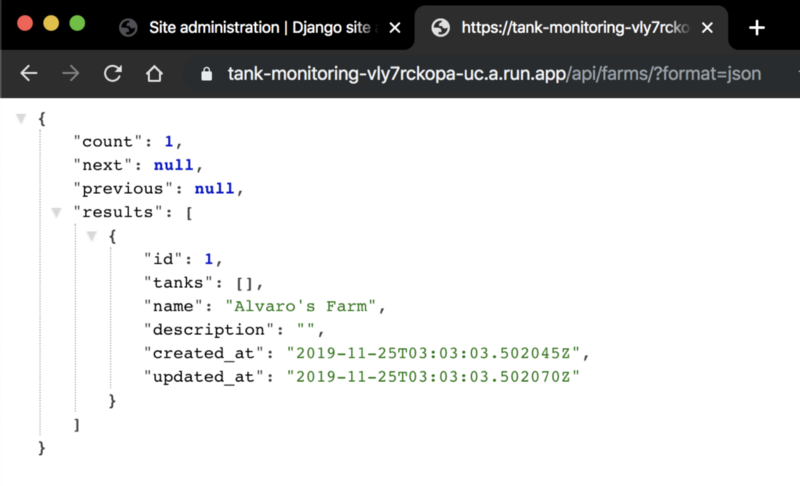
The application contains 3 models for the Farm, Tanks that are going to be monitored on the Farm and the Device that is going to be associated to a Tank. Those models are going to be stored on Cloud SQL and will have a Rest APIs available for CRUD actions ( create, read, update, delete ).
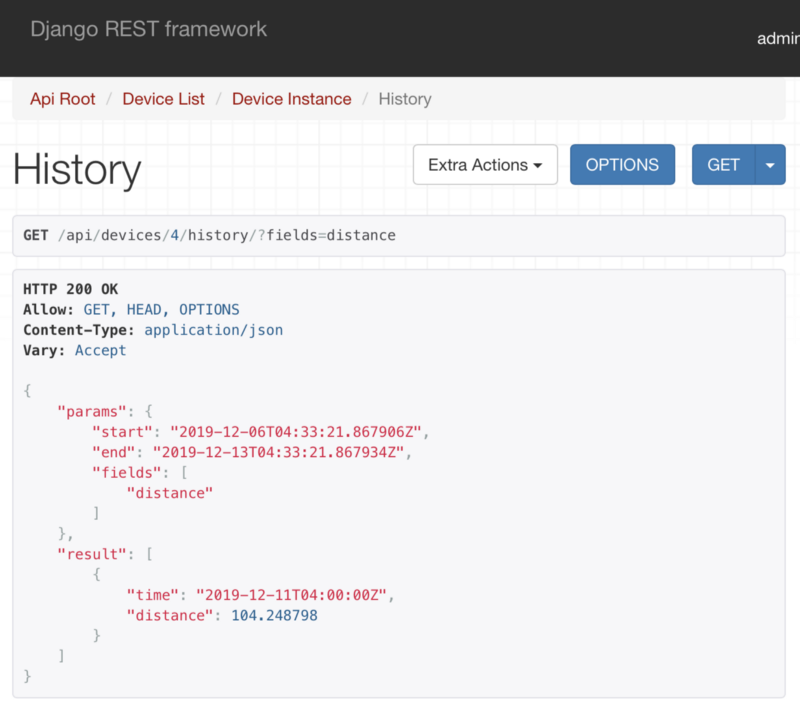
Another important endpoint is for the device to send data. It’s an endpoint that accepts the device ID, checks if the device exists, if not creates the device on CloudSQL and them save the telemetry data on BigQuery. Using BigQuery for IoT devices telemetry makes sense because we don’t have to worry about the scalability as our project grows and more devices start reporting data frequently.
Creating GCP Project, Cloud SQL Database and BigQuery
To get started with Google Cloud you can do you can do all on the Cloud Console web interface, but the command line tools is a more powerful tool and we’ll need later to deploy our application. To use the gcloud command line tools, follow the instructions here to download and install it.
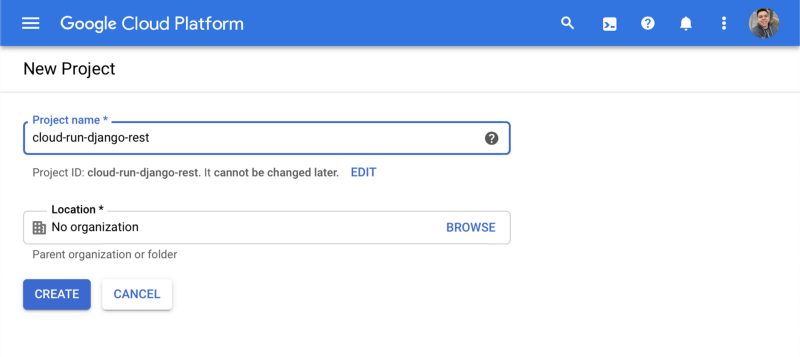
Also after this you should authenticate and create a project to use in this tutorial, exchange [YOUR_PROJECT_NAME] with a name that you want for this project:
# To install some cloud build tools
gcloud components install beta

# Authenticate with Google Cloud:
gcloud auth login
gcloud auth application-default login

# Create cloud project — choose your unique project name:
gcloud projects create [YOUR_PROJECT_NAME]

# Set current project
gcloud config set project [YOUR_PROJECT_NAME]

# Enable SQL admin on gcloud
gcloud services enable sqladmin
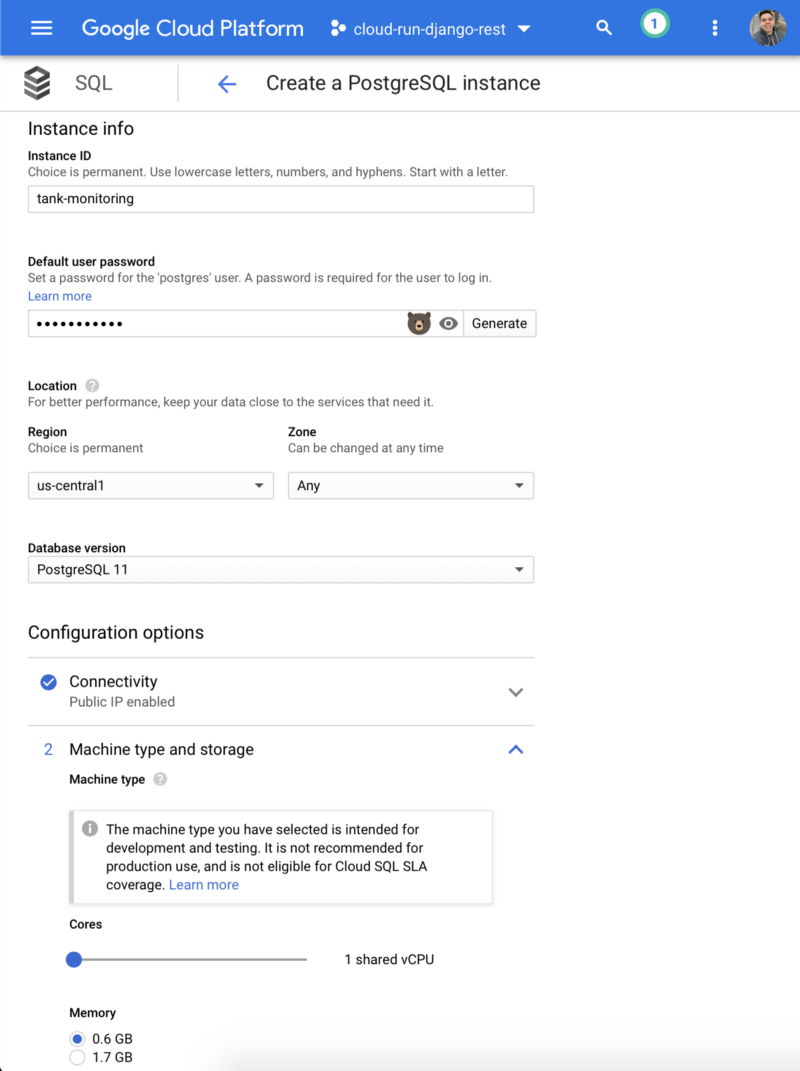
Now we need to create the Cloud SQL instance. This project application is set up to use PostgresSQL, but MySQL can also be used with some minor changes. I recommend following the steps on this page to create the database instance and also to install the SQL Proxy tool for connecting to the remote database on your local machine, this is going to be important to run DB migrations.
Cloud SQL unfortunately doesn’t have a free tier, but new account have a $300 of credits that is more than enough for testing and also I recommend creating a smaller instance if you are just learning.
Quickstart for using the proxy for local testing | Cloud SQL for PostgreSQL | Google Cloud
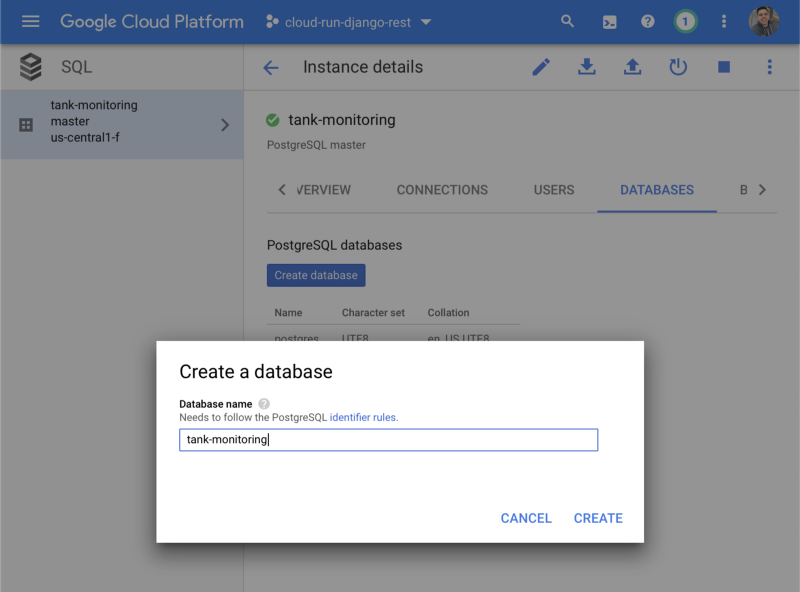
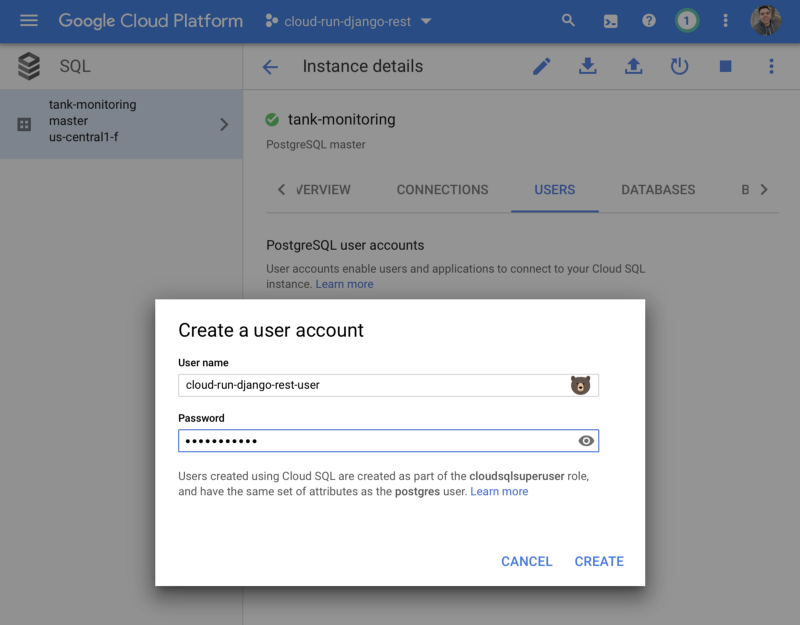
After the Cloud SQL instance is created, create a new database by using the GCP Console for your Cloud SQL instance. For example, you can use the name tank_monitoring. Also create a new user by using the GCP Console for your Cloud SQL instance.
Them we need to download and set up the Cloud SQL Proxy tool to connect to the remote database, so we can run the Django migrations, create the database and the user for the admin interface.
# Download the Cloud SQL Proxy and give permission locally - this is for macOS
curl -o cloud_sql_proxy [https://dl.google.com/cloudsql/cloud_sql_proxy.darwin.amd64](https://dl.google.com/cloudsql/cloud_sql_proxy.darwin.amd64)
chmod +x cloud_sql_proxy

# After creating the database instance, get the instance connection string
gcloud sql instances describe [YOUR_INSTANCE_NAME]

# Run in another tab the proxy
./cloud_sql_proxy -instances=<INSTANCE_CONNECTION_NAME>=tcp:5432
Running that will make the remote database available as it is running locally, which is pretty awesome. Now let’s run the migrations and create the user. You need to fill the environment variables with your settings when you created the Cloud SQL database:
export DJANGO_DEVELOPMENT=True
export DB_USER=[DB_USER]
export DB_PASS=[DB_PASS]
export DB_NAME=[DB_PASS]
python manage.py migrate
python manage.py createsuperuser

# You can run the application locally pointing to the remote database to test things if you want
python manage.py runserver
Now that all the struct on Cloud SQL is created, let’s deploy our backend on Cloud Run. To do that, we need to create the Docker image and them deploy it on Cloud Run. Follow the steps:
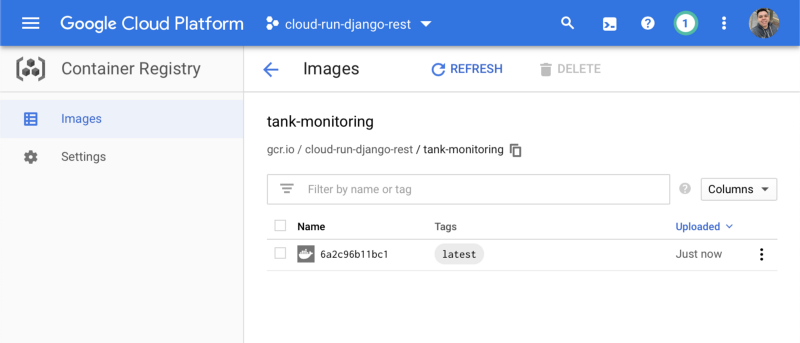
gcloud builds submit — -tag gcr.io/[YOUR_PROJECT_NAME]/tank-monitoring .
You can check that you docker image was successfully created on Google Cloud Container Registry :
With the container image deployed, run the following command to deploy that image to Cloud Run. Choose option 1 to deploy as a fully managed service, I recommend selecting us-central1 region because is one of the cheapest ones and on the last question you can choose yes to allow unauthenticated calls.
export DB_USER=[DB_USER]
export DB_PASS=[DB_PASS]
export DB_NAME=[DB_PASS]
export DB_CONNECTION_NAME=[DB_CONNECTION_NAME]
export GCLOUD_PROJECT=[YOUR_PROJECT_NAME]
gcloud beta run deploy --image gcr.io/[YOUR_PROJECT_NAME]/tank-monitoring \
  —add-cloudsql-instances $DB_CONNECTION_NAME \
  —set-env-vars GCLOUD_PROJECT=$GCLOUD_PROJECT \
  —set-env-vars DB_CONNECTION_NAME=$DB_CONNECTION_NAME \
  —set-env-vars DB_USER=$DB_USER \
  —set-env-vars DB_PASS=$DB_PASS \
  —set-env-vars DB_NAME=$DB_PASS
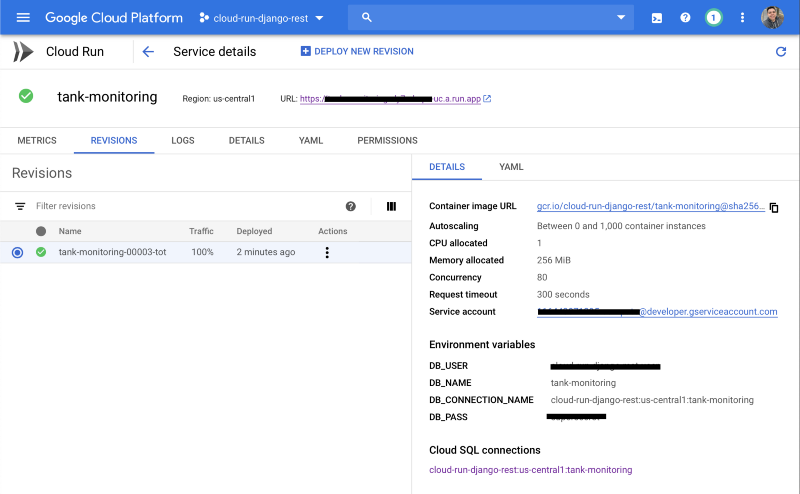
Also notice that those environment variables just need to be passed once, later you can update the version without providing all of them, but if you need to add/remove a new environment variable, you need to deploy specifying all of them. You can check for the deployed service on Cloud Run page.
gcloud beta run tank-monitoring deploy — image gcr.io/[YOUR_PROJECT_NAME]/tank-monitoring to create a new revision and maintain the same environment variables.
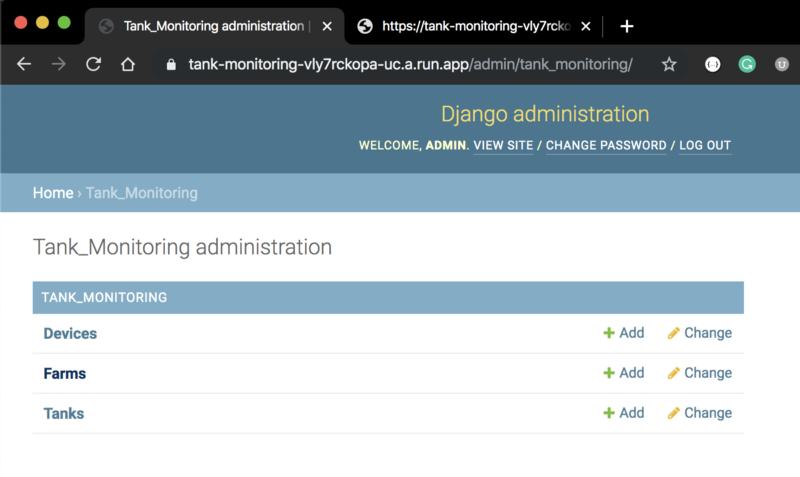
And that’s basically it !!! You can access Django Admin interface to manage the our project models.
Conclusion
In this first part we went thought all steps to deploy a serveless backend to our farm tanks monitoring project. To be honest this architecture can be applied on other IoT projects with a similar approach. And there is always room for improvements, I added some future ideas to improve the current project and please, let me know if you have more ideas related with that :
- Add user authentication : The APIs right now are public, but we can add an Json Web Token (JWT) authentication and only allow authenticated users to access the base REST APIs.
- Add device authentication : We can restrict to only know devices to send data or even add even more security requiring the device to generate an JWT token that uses the a shared secret between the device and the server. Cloud IoT Core already do that and I explored that on other articles, but I wanted to keep this really simple, but is important to think on security approaches to restrict which devices have access to you backend.
- Add a realtime layer with Firebase: would be nice to know the current state of each tank without having to run a query on BigQuery, so we can save that on Firebase and have always up to date data to be used on our apps. But I’ll not cover that as I already explored that a lot on other articles that I wrote about IoT architecture.
- Trigger and send alerts depending on rules : We can add a low threshold value to each tank and send an email when an alert condition is detected.
- Send telemetry data to PubSub and process asynchronously : This is a really important concept when we talk about scalable system. Doing that we can decouple the data reception from other logics to save data to the database ( or multiple databases ) and also other features that we can add later, like the alerts idea that I mentioned before.
Be sure to check the other parts of this tutorial to see the whole solution.
References
- https://www.django-rest-framework.org/tutorial/quickstart/
- https://cloud.google.com/sql/docs/postgres/quickstart-proxy-test
- https://github.com/GoogleCloudPlatform/python-docs-samples
- https://cloud.google.com/python/django/kubernetes-engine
- https://medium.com/swlh/say-hello-to-serverless-containers-with-cloud-run-4c32d90330fc
- https://cloud.google.com/run/